
Exact ingredients for your sourdough loaf
Tell us how many loaves, what size, and how wet you want the dough. We will work out the flour, water, starter and salt, to the gram, using baker's percentages.

Recipe calculator
Enter your loaves, hydration, starter and flour. We do the maths and show the exact weights.
60 to 90 percent. Easy is forgiving and beginner-friendly. Medium gives an open crumb. Advanced is wet and sticky but rewarding.
Weight of your active, 100% hydration starter. Don't have one yet?
Your recipe updates as you change the inputs.
Your recipe
801 g total dough ·Weigh each ingredient with a kitchen scale. Combine in the order shown on the timeline below.
Total dough weight is 801 g.
Timeline
A rough plan for a single bake from mix to crust. Start in the morning, leave overnight, bake the next morning.
- 130 to 60 minutes
Show me how
What to do
- Pour the flour into a large mixing bowl.
- Pour in most of the water, holding back about 20g for later.
- Mix with a spoon or your hand until there is no dry flour left. It will look shaggy and rough. That is fine.
- Cover the bowl with a damp cloth or plate.
- Set a timer and leave it alone for 30 to 60 minutes.
What it should look like
- All the dry flour is gone before you start the rest.
- After the rest, the dough has relaxed slightly and feels less stiff when you poke it.
If it goes wrong
If the dough feels dry or won't come together, your flour is probably very absorbent. Splash in 10 to 20g more water and keep mixing.
- 24 to 6 hours at room temperature
Show me how
What to do
- Add the starter and the salt on top of the rested dough.
- Pour the remaining water you held back over the salt.
- Pinch and squeeze with wet hands for a minute or two until the salt is fully mixed in.
- Cover the bowl. Note the time.
- Every 30 minutes for the first 2 hours, do a stretch and fold: wet your hand, grab one side of the dough, lift it up and over to the other side. Rotate the bowl a quarter turn. Repeat 3 more times. That is one set.
- After the first 2 hours, leave the dough alone for the rest of bulk. Doing folds late can deflate it.
What it should look like
- After about 4 to 6 hours, the dough has risen by 50 to 75 percent (not quite doubled).
- The surface is smooth and slightly domed.
- Visible bubbles on the top and along the sides of the bowl.
- When you tilt the bowl, the dough wobbles slightly but holds its shape.
If it goes wrong
Too cold a kitchen will slow this right down. If your kitchen is under 18°C, allow 7 to 9 hours and watch for the visual cues above rather than the clock.
- 38 to 16 hours, usually overnight in the fridge
Show me how
What to do
- Tip the dough onto a lightly floured surface.
- Pat it gently into a rough rectangle, about 1 inch thick.
- Fold the left side into the middle, then the right side over that.
- Starting from the bottom, roll it up tightly into a ball or oval.
- Rest seam-side down for 10 minutes to relax.
- Flour a banneton (a proofing basket) or a bowl lined with a floured tea towel.
- Place the dough seam-side up into the banneton.
- Cover with cling film or a shower cap and put in the fridge.
What it should look like
- After shaping, the surface of the dough is taut and slightly resistant when you poke it.
- Out of the fridge the next day, the dough is cold and firm. When you poke it gently, the indent springs back slowly.
If it goes wrong
If the dough is too sticky to shape, dust more flour on the surface. If it spreads out flat overnight in the fridge, it is over-fermented; shorten bulk fermentation next time.
- 445 to 60 minutes
Show me how
What to do
- About an hour before you want to bake, set your oven to 250°C (480°F).
- Put your Dutch oven (a heavy cast-iron or enamelled pot with a lid) inside while it preheats.
- Make sure the pot has room to expand and that you can safely take it in and out.
- Wait the full 45 to 60 minutes. Skipping this is the single most common cause of a flat, pale loaf.
What it should look like
- The oven thermometer (or display) holds steady at 250°C.
- If you flick a drop of water on the outside of the pot, it sizzles violently and evaporates instantly.
If it goes wrong
No Dutch oven? Use a heavy baking tray with a separate tray of boiling water on the rack below to create steam. The crust will be slightly less dramatic but still good.
- 520 minutes
Show me how
What to do
- Take the dough out of the fridge.
- Turn it gently onto a piece of baking paper, seam-side down.
- Score the top with a sharp blade. The classic cut is one curved slash across the top, about 1cm deep, held at a 30 to 45 degree angle.
- Use the baking paper as a sling to lower the dough into the hot Dutch oven.
- Put the lid on. Set a timer for 20 minutes.
- Do not open the lid during this phase. The steam doing the work needs to stay inside.
What it should look like
- After 20 minutes, the lid will be too hot to touch without oven gloves.
- You may hear faint crackling from inside.
If it goes wrong
If your score barely opened up after baking, your blade was blunt or your cut was too shallow. Use a fresh razor or proper lame and cut about 1cm deep at an angle.
- 620 to 25 minutes
Show me how
What to do
- Carefully lift the lid off the Dutch oven. Hot steam will escape - keep your face back.
- Continue baking for another 20 to 25 minutes.
- If the crust is browning too fast, drop the oven temperature to 230°C.
- When done, lift the loaf out (use baking paper or two spatulas) and put it on a wire rack to cool.
- Do not slice it for at least an hour. The crumb structure sets as it cools, and cutting too early gives you a gummy interior.
What it should look like
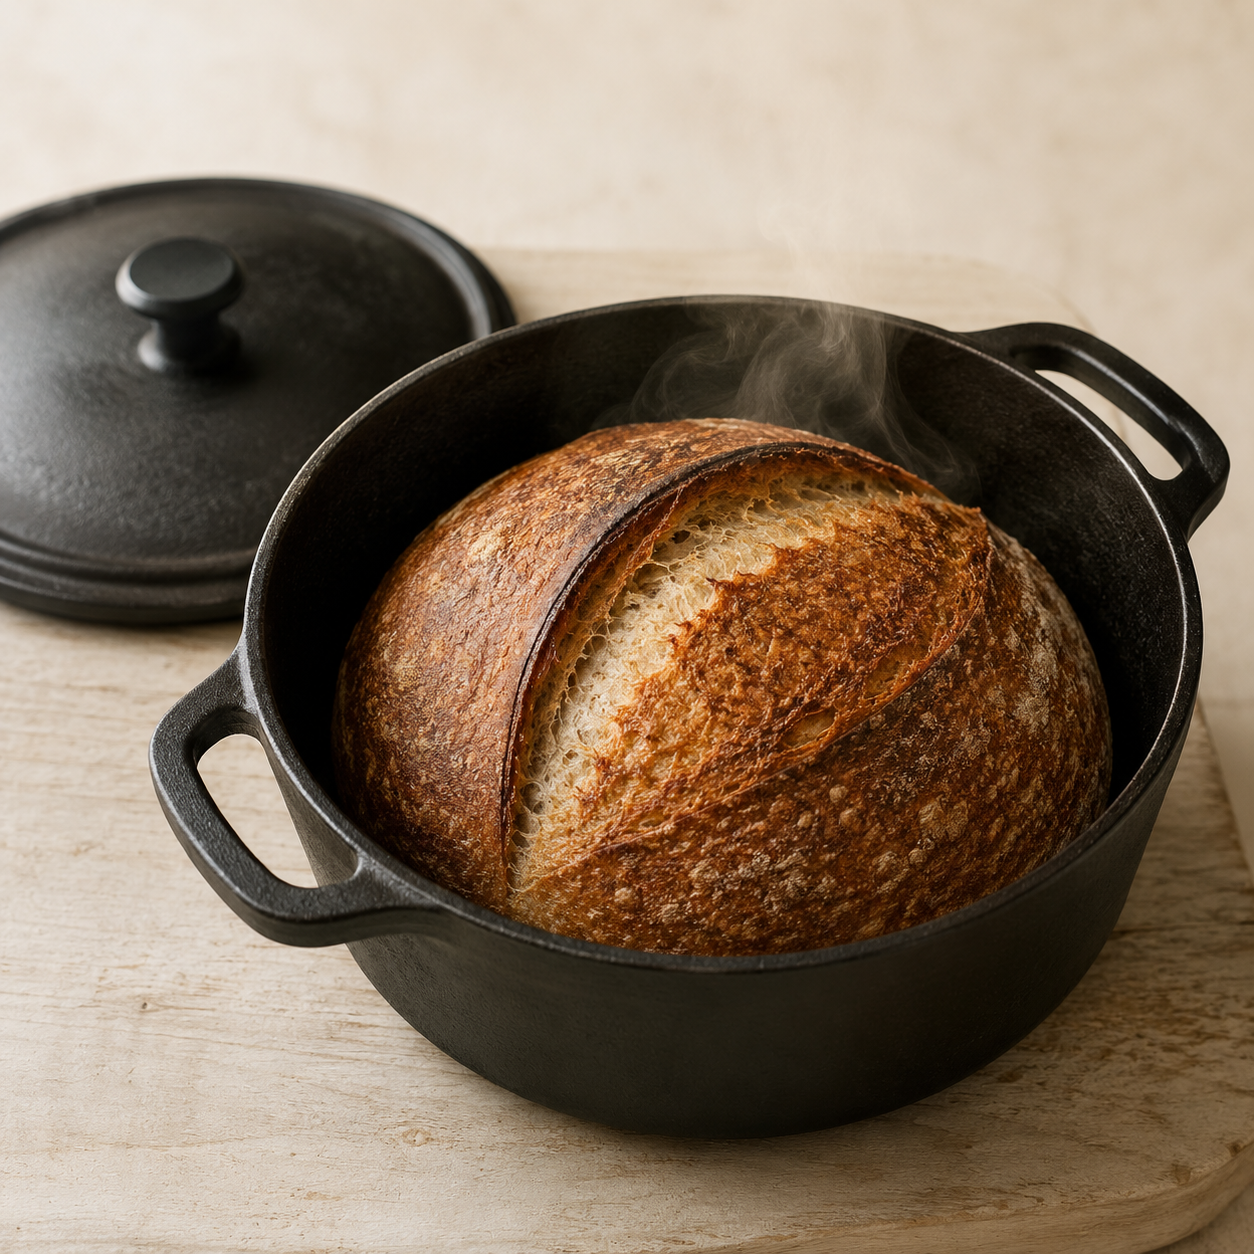
- Deep, almost mahogany-brown crust. Pale sourdough is undercooked.
- Cracked, blistered surface.
- When you tap the bottom, it sounds hollow.
- Internal temperature about 95°C (203°F) if you check with a thermometer.
If it goes wrong
Pale, soft crust usually means your oven was not hot enough or the lid came off too late. Crust too dark? Drop the temperature by 10°C for the uncovered phase next time.
How it works
- 1
Pick your loaf
Choose how many loaves you want, what size, and how hydrated the dough should be.
- 2
We do the maths
We work out flour weight from your target dough weight, then derive the rest using the baker's percentage formula.
- 3
You bake
Follow the recipe card and the timeline. The numbers are precise so your bread will be consistent.
Need to know when to start?
The timeline calculator turns a target bake time into exact clock times for feeding starter, mixing, bulk, cold proof, preheat and bake — adjusted for your kitchen temperature, hydration, and flour type.
Open the timeline calculator
New to sourdough?
Start here. Plain-English articles on how to make a starter, what hydration really means, and how to read a sourdough recipe.
Browse articlesComing soon
Save recipes and log every bake
A Pro tier with recipe saving, bake logging and an ad-free experience is on the way.